Lekhapal User Manual
Get Started
  • Selling

    • Point of Sale
    • Sales
    • Loyalty
    • Online Store
  • Buying & Books

    • Purchase
    • Accounting
  • Operations

    • Inventory
    • CRM
    • Human Resources
Reports
Administration
  • Sign in
  • Create an account
  • Website
  • English
  • नेपाली
Get Started
  • Selling

    • Point of Sale
    • Sales
    • Loyalty
    • Online Store
  • Buying & Books

    • Purchase
    • Accounting
  • Operations

    • Inventory
    • CRM
    • Human Resources
Reports
Administration
  • Sign in
  • Create an account
  • Website
  • English
  • नेपाली
  • Getting Started

    • Overview
    • Accounting Basics
    • Create an Account
    • Signing In
    • Dashboard
    • Quick Add
  • Point of Sale
  • Sales

    • Overview
    • Quotation
    • Sales Order
    • Sales Invoice
    • Credit Note
    • Customer Payment
    • Allocate Customer Payment
  • Purchase

    • Overview
    • Purchase Order
    • Purchases
    • Expenses
    • Debit Note
    • Supplier Payment
    • Allocate Supplier Payment
  • Accounting

    • Overview
    • Bank Accounts
    • Cheque Register
    • Journal Voucher
    • Chart of Accounts
    • Contra Entry
    • Opening Balance
  • Inventory

    • Overview
    • Products
    • Movements
    • Manufacturing
    • Master Data
  • CRM
  • Loyalty
  • Human Resources

    • Overview
    • Self-Service
    • People & Organisation
    • Time & Attendance
    • Payroll & Compensation
    • HR Settings
  • Online Store
  • Reports

    • Overview
    • POS Reports
    • Sales Reports
    • Purchase Reports
    • Receivable & Payable
    • Party Reports
    • Tax Reports
    • Inventory Reports
    • Accounting Reports
    • Asset Reports
    • System Reports
  • Administration

    • Overview
    • Roles & Permissions
    • Users
    • Settings
    • File Manager
    • My Subscription

Master Data

Master data is the set of reference lists every product record draws on. Get these right first and creating products becomes a matter of picking from dropdowns rather than typing free text.

All three live under Inventory → Master Data, and share one screen with tabs across the top: Overview, Units, Brands and Categories, each showing a count. Every list has a search box, Comfortable / Compact density and Bulk edit.

Units

A unit of measure is how you count a product — pieces, kilograms, litres, boxes.

Master Data → Units
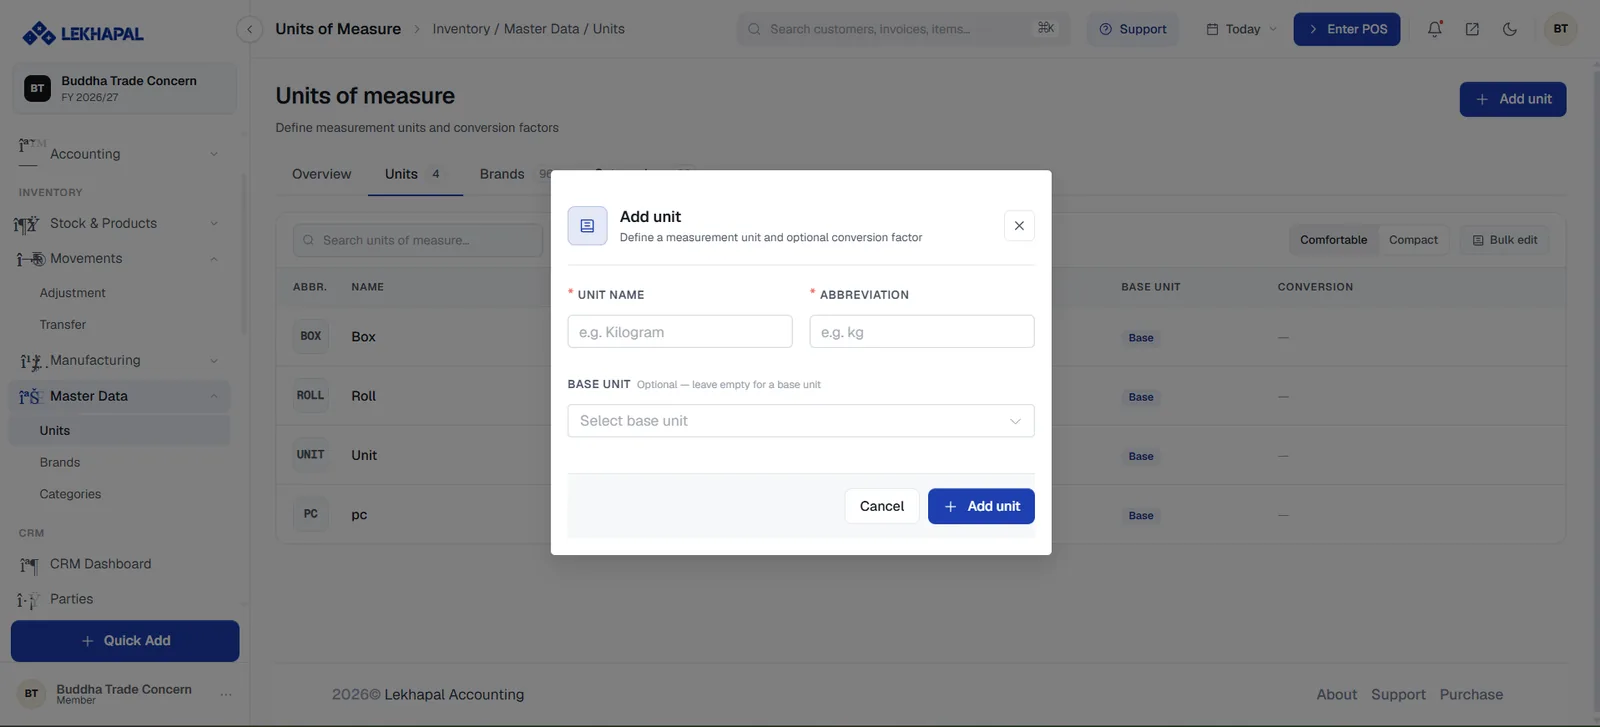
Units of measure, with the Add unit dialog open.

To add one:

  1. Click + Add unit.
  2. Enter the Unit Name (for example Kilogram) and its Abbreviation (kg).
  3. Optionally set a Base Unit. Leave it empty to create a base unit; set it to define a conversion — for instance a Box holding 12 pc.
  4. Click Add unit.

The list shows each unit's abbreviation, name, base unit and conversion factor.

Conversions earn their keep

If you buy in boxes and sell in pieces, define Box with pc as its base unit and the right conversion factor. You can then set a product's Purchase unit to Box and its Sale unit to pc, and Lekhapal keeps the stock arithmetic straight.

Brands

Brands classify products by manufacturer or label.

Master Data → Brands
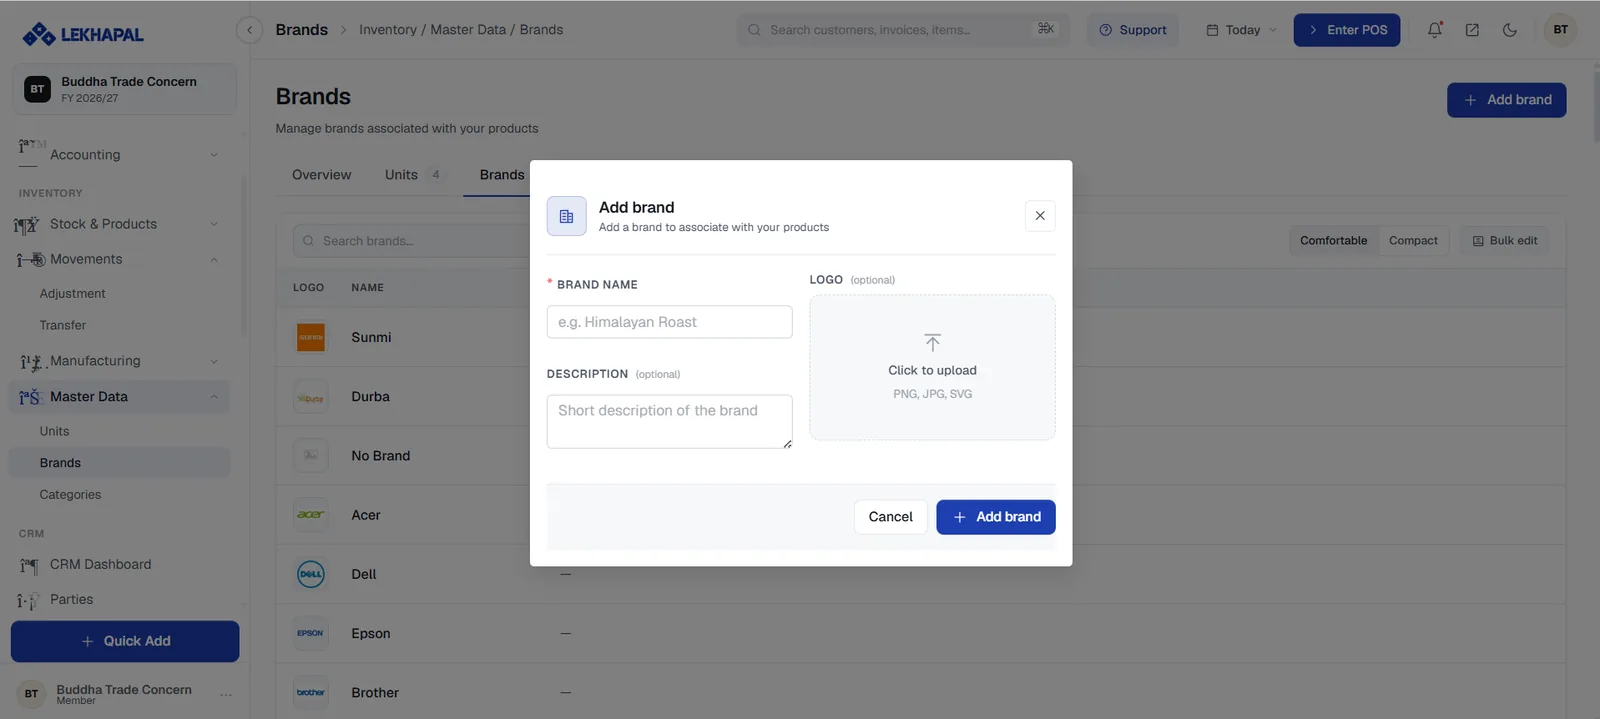
Brands, with the Add brand dialog open.

  1. Click + Add brand.
  2. Enter the Brand Name.
  3. Add an optional Description and upload a Logo (PNG, JPG or SVG).
  4. Click Add brand.

The brand logo appears against products in the product list and can be used as a filter at the point of sale.

Example. Nike, Samsung, Epson, Dell.

Categories

Categories organise products into groups. They drive the category tiles on the POS and the grouping in several reports.

Master Data → Categories
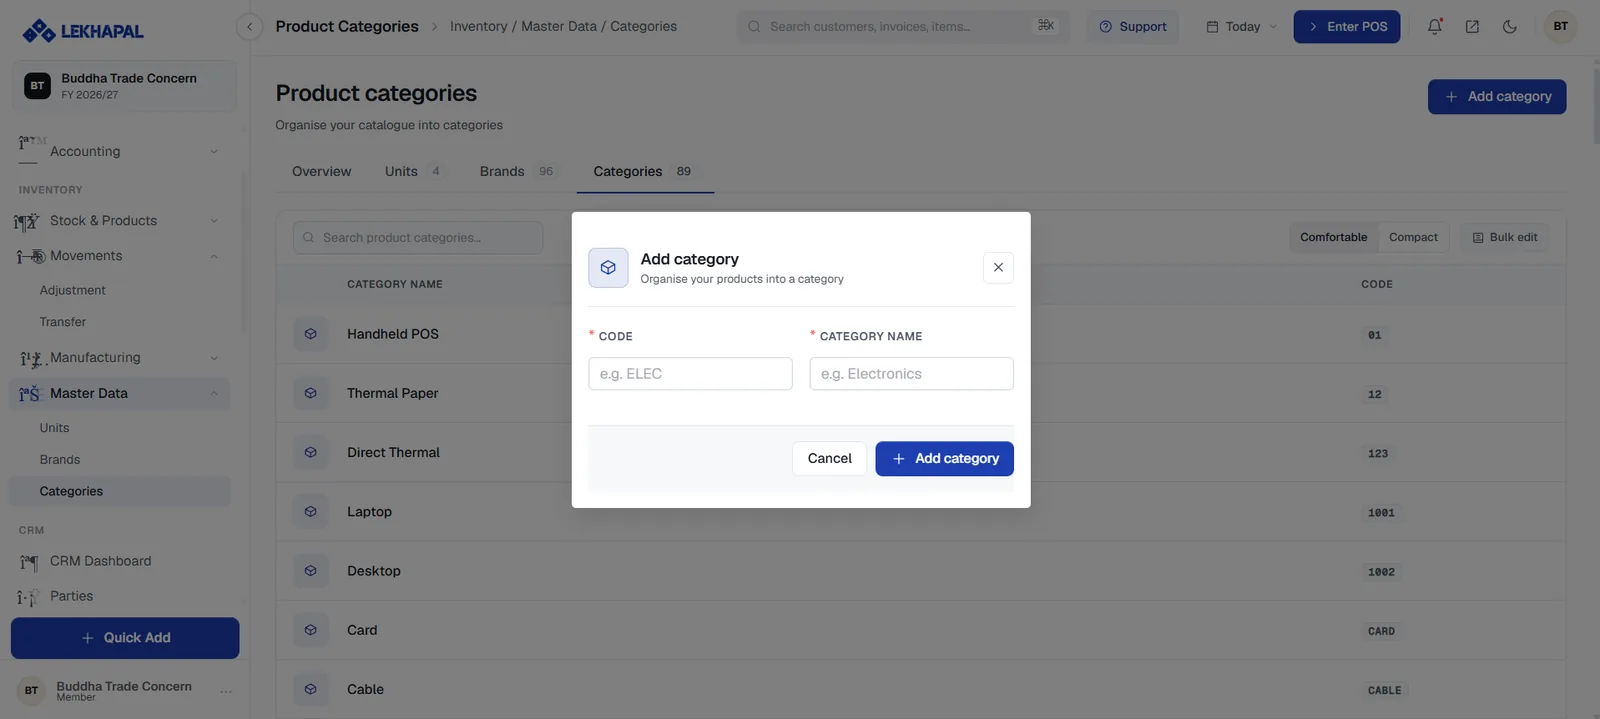
Product categories, with the Add category dialog open.

  1. Click + Add category.
  2. Enter a Code (for example ELEC) and a Category Name (Electronics).
  3. Click Add category.

The Code is what appears in listings and exports, so keep it short and consistent.

Example. Electronics, Clothing, Bakery, Milk Products.

Next

→ CRM

Prev
Manufacturing