Point of Sale
The POS is the counter screen. It is built for speed: pick items, take payment, print the bill. Behind that, every completed order posts a sale, reduces stock, calculates VAT and updates the customer's balance — no separate invoicing step.
Open the POS
- Click Enter POS from the dashboard top bar.
- The POS screen opens full width.
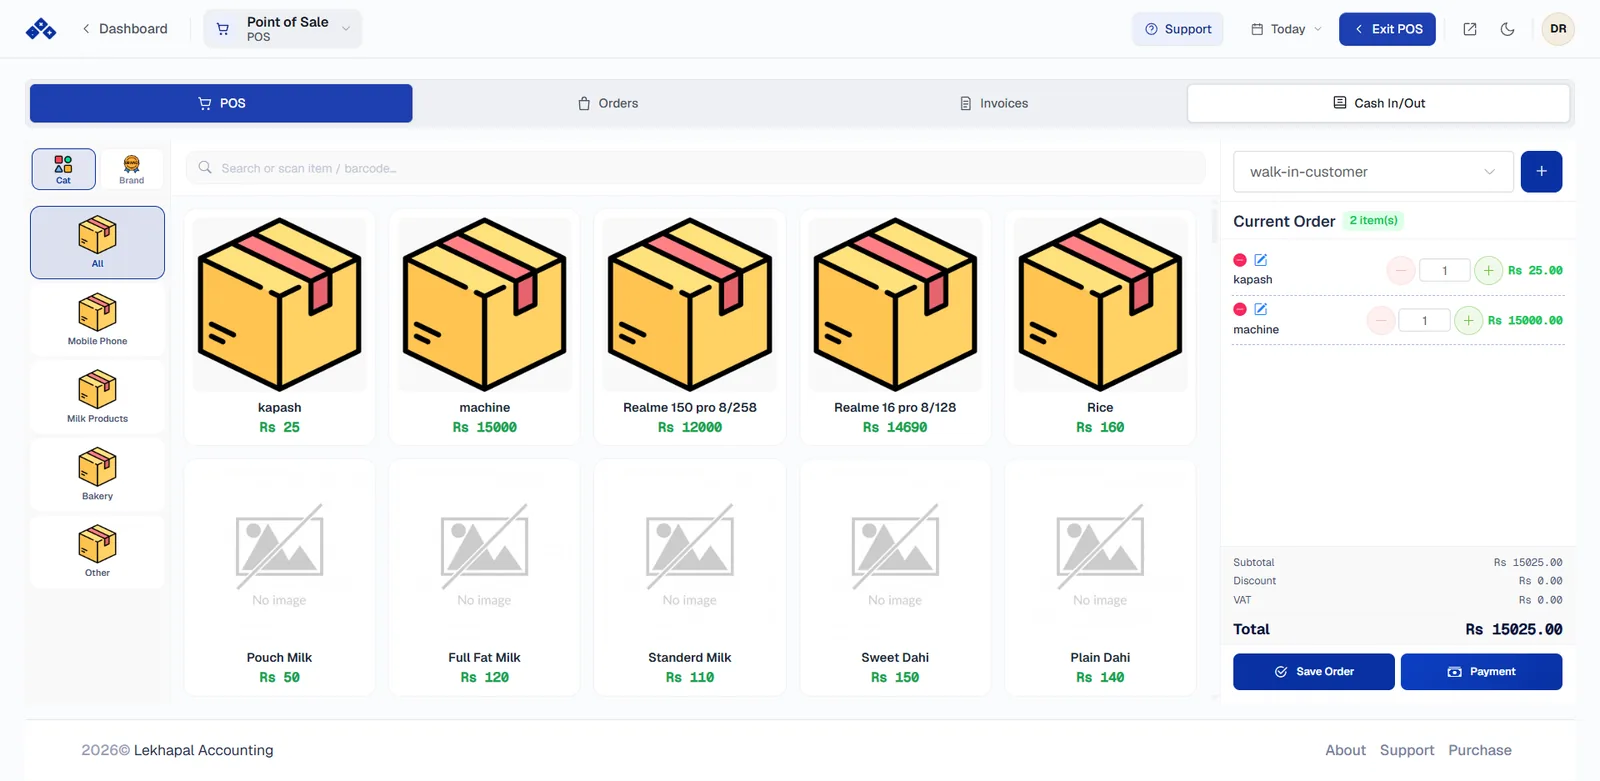
The screen is in three columns:
| Column | Contents |
|---|---|
| Left | Filters — switch between Cat (category) and Brand, then pick one to narrow the grid |
| Middle | The product grid, plus a Search or scan item / barcode box |
| Right | The current order, the customer, the bill summary and the action buttons |
Across the top sit four tabs — POS, Orders, Invoices and Cash In/Out — and Exit POS returns you to the dashboard.
Select items
- Click a category on the left (for example Bakery or Milk Products), or leave it on All.
- Click an item in the grid.
- The item is added to Current Order on the right.
You can also type into the search box, or scan a barcode with a connected scanner — the matching item is added straight to the order.
Manage the order
In the Current Order panel each line has:
- − and + to decrease or increase the quantity, with the quantity in a box between them that you can type into,
- an edit icon to change the line (price, discount, note),
- a remove icon to take the line off the order.
The bill summary at the foot of the panel recalculates automatically as you go.
Choose the customer
The customer selector sits above the order. By default every sale is booked to walk-in-customer, which is right for anonymous counter trade.
To bill a named customer, pick them from the dropdown. To create one on the spot, click + beside the selector:
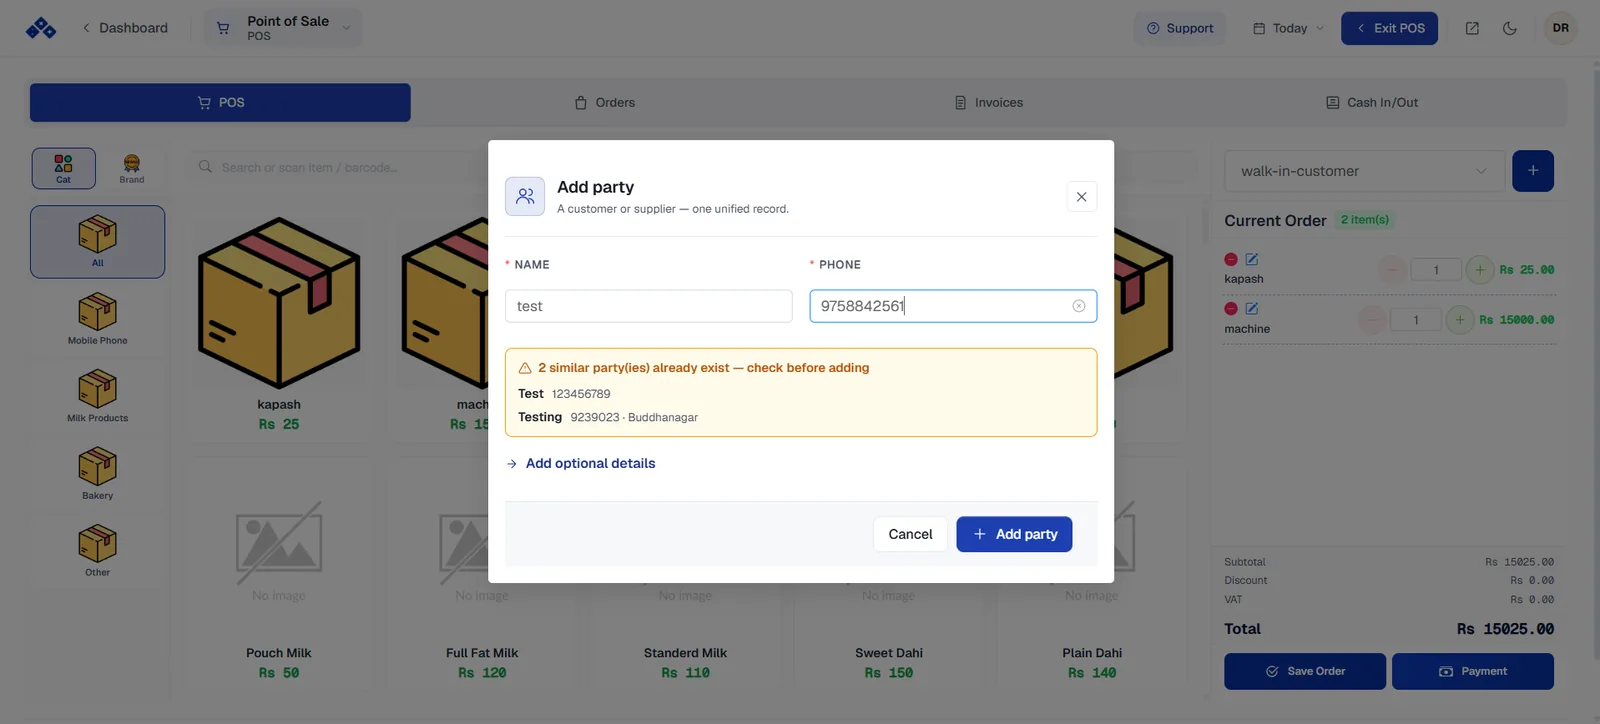
- Enter the Name and Phone — both are required.
- Lekhapal checks for near-duplicates as you type and warns you if similar parties already exist. Check the list before adding.
- Click Add optional details to record address, PAN and the rest.
- Click Add party.
One record, both roles
A party in Lekhapal is a single unified record that can act as a customer, a supplier or both. See Parties.
Naming the customer is what makes loyalty points, credit sales and the Sales by Customer report work, so it is worth doing for regulars.
Check the bill summary
The summary at the foot of the right-hand column shows:
- Subtotal
- Discount, if any has been applied
- VAT
- Total
Everything is calculated for you as lines are added and changed.
Save or take payment
Two buttons close the order:
| Button | Use it when |
|---|---|
| Save Order | The customer is still shopping, or the bill is on hold. The order is kept as pending and appears under the Orders tab |
| Payment | The customer is ready to pay. Opens the payment screen |
Take payment
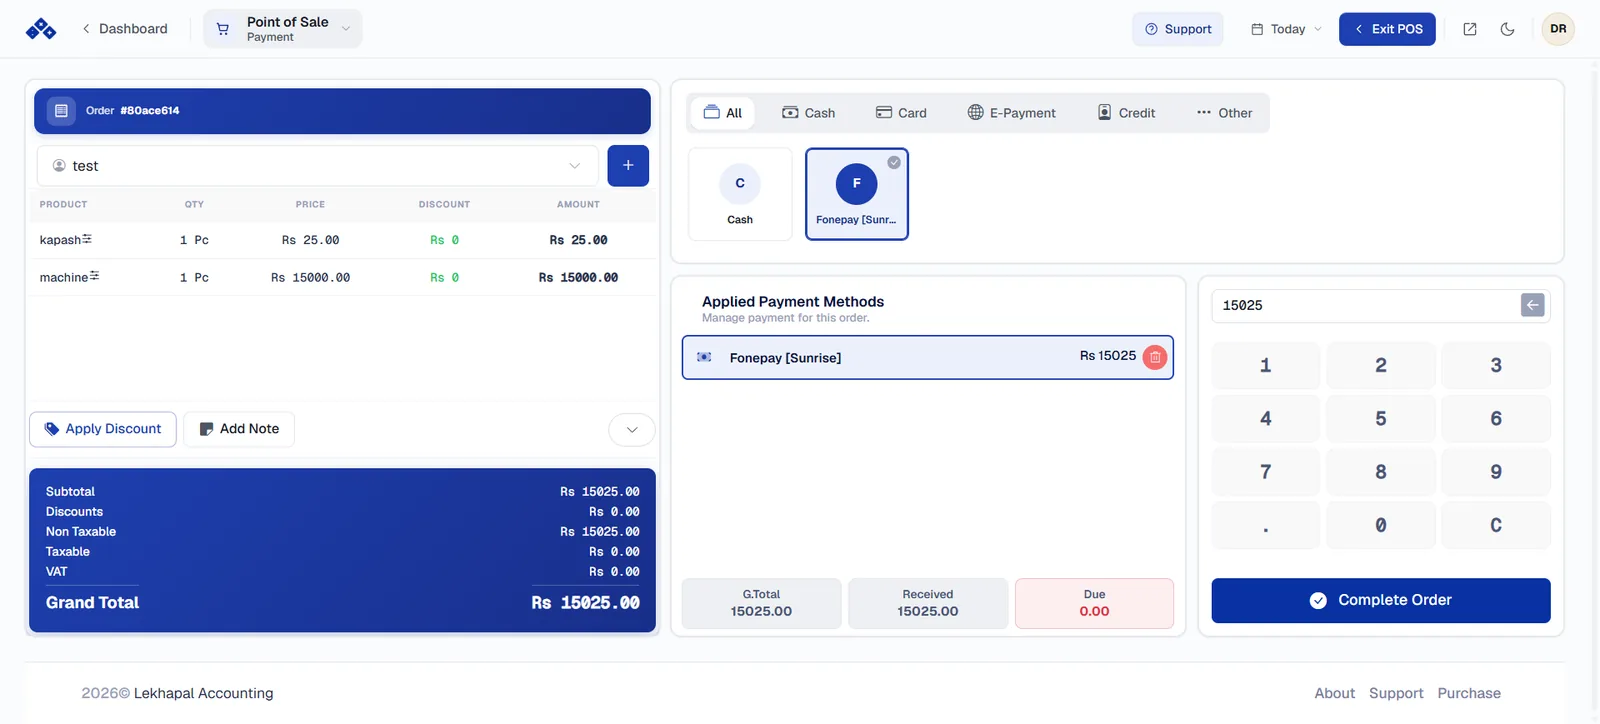
The payment screen shows the order on the left and payment collection on the right.
- Choose a payment method from the tabs across the top — Cash, Card, E-Payment, Credit or Other — then click the specific account (for example Cash, or an e-wallet such as Fonepay).
- Enter the amount received using the on-screen keypad or your keyboard.
- The method appears under Applied Payment Methods with its amount. Add a second method for a split payment, or use the delete icon to remove one.
- Watch the three totals at the foot: G.Total, Received and Due. Due must reach 0.00 for a fully paid bill.
- Click Complete Order.
Before completing, you can still use Apply Discount and Add Note on the order panel. The tax breakdown — Subtotal, Discounts, Non Taxable, Taxable, VAT and Grand Total — updates as you do.
Selling on credit
Choose Credit as the payment method to complete the sale without collecting money. The balance becomes a receivable and is cleared later through Customer Payment.
Invoice and record
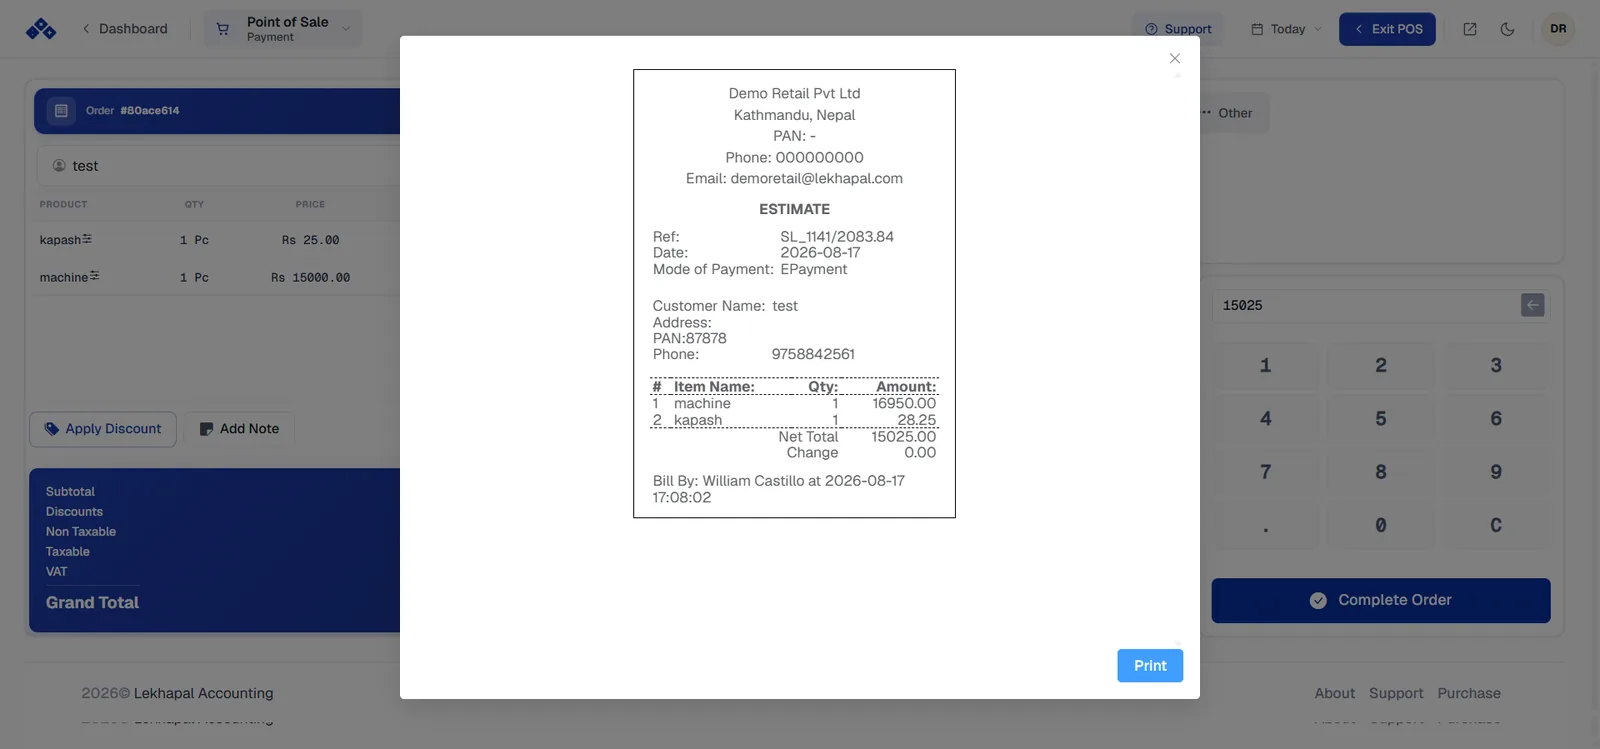
As soon as the order is completed:
- the invoice is generated automatically, showing your business details, the reference number, date, mode of payment, customer details, the item lines and the net total;
- you can print it or share it;
- the sale is recorded in the system instantly — stock, books, VAT and the customer balance all update together.
The other POS tabs
| Tab | What it holds |
|---|---|
| Orders | Saved and pending orders. Reopen one to continue or complete it |
| Invoices | Completed POS invoices — reprint or review |
| Cash In/Out | Cash movements at the counter outside of sales, such as a float or a payout |
Reporting on the counter
Four reports cover POS activity specifically:
- Order Report — orders placed in a period
- Session Report — opening cash, activity, closing cash
- Day Report — the day's sales, tax and payments
- Transaction List — individual POS transactions
Next
→ Sales — quotations, orders and invoices raised away from the counter