Products
Products are the items you sell. Everything else in Lekhapal — a POS button, an invoice line, a stock report — points back to a product record.
The product list
Stock & Products → Products
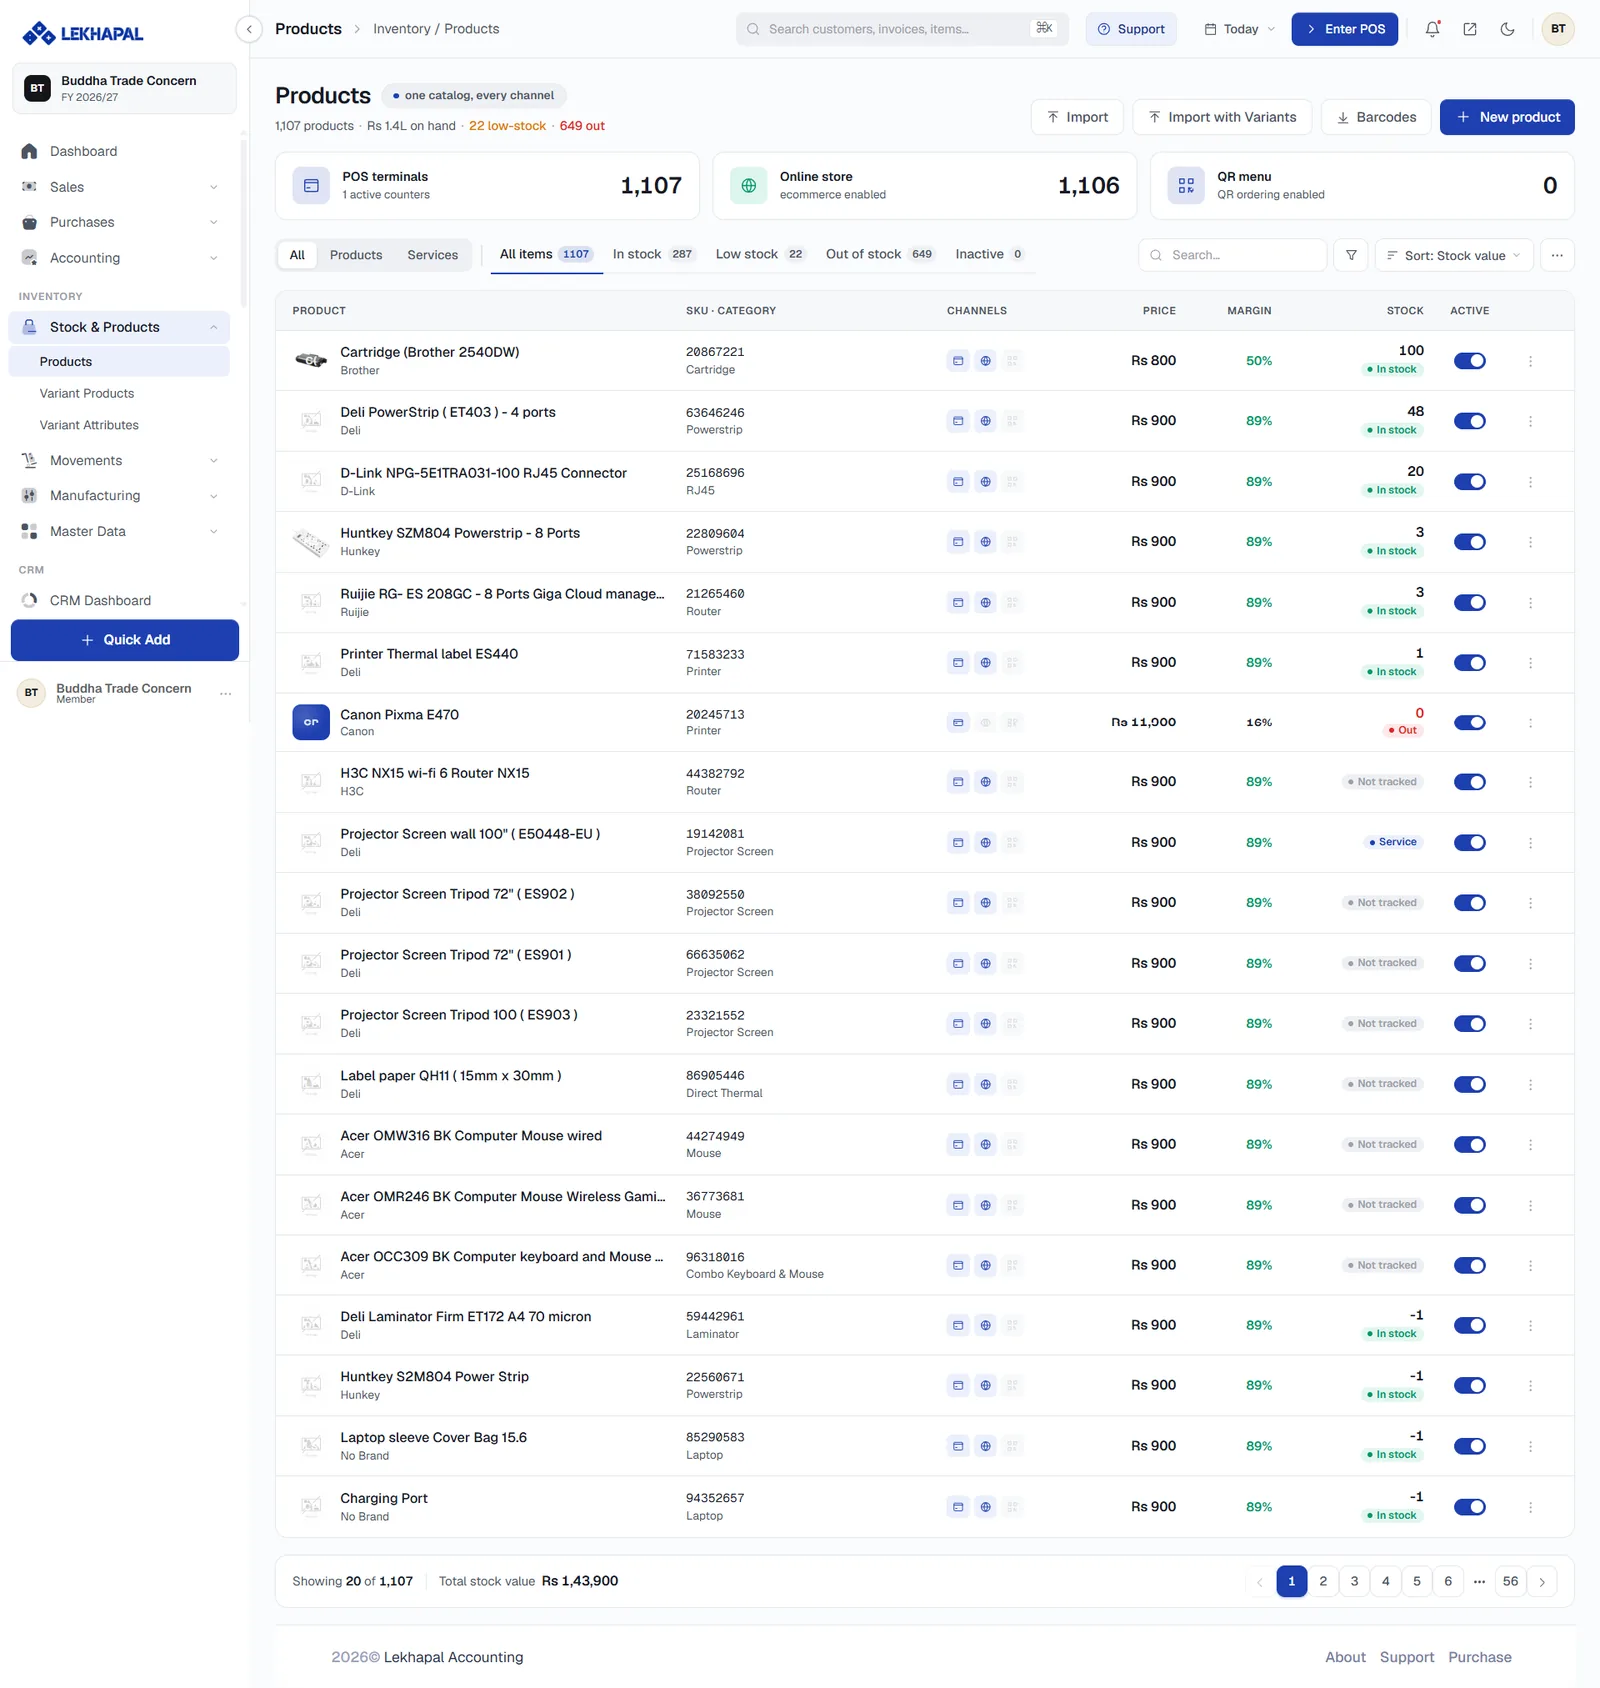
The header summarises your catalogue in one line: the number of products, the stock value on hand, and how many are low-stock or out.
Three cards below show where the catalogue is published:
| Card | Meaning |
|---|---|
| POS terminals | Products available at the counter, and how many counters are active |
| Online store | Products published to e-commerce |
| QR menu | Products available for QR ordering |
Filters
Two rows of filters:
- All · Products · Services — by product type.
- All items · In stock · Low stock · Out of stock · Inactive — by stock state, each with a count.
Then a search box, a filter icon, and Sort (stock value, name, and so on).
The table
| Column | Shows |
|---|---|
| Product | Name, thumbnail and brand |
| SKU · Category | The item code and its category |
| Channels | Icons for POS, online store and QR menu |
| Price | Selling price |
| Margin | Percentage margin over cost |
| Stock | Quantity, with an In stock / Out / Not tracked / Service badge |
| Active | A toggle to publish or retire the product |
Header actions
Import, Import with Variants, Barcodes (bulk label printing) and + New product.
Create a product
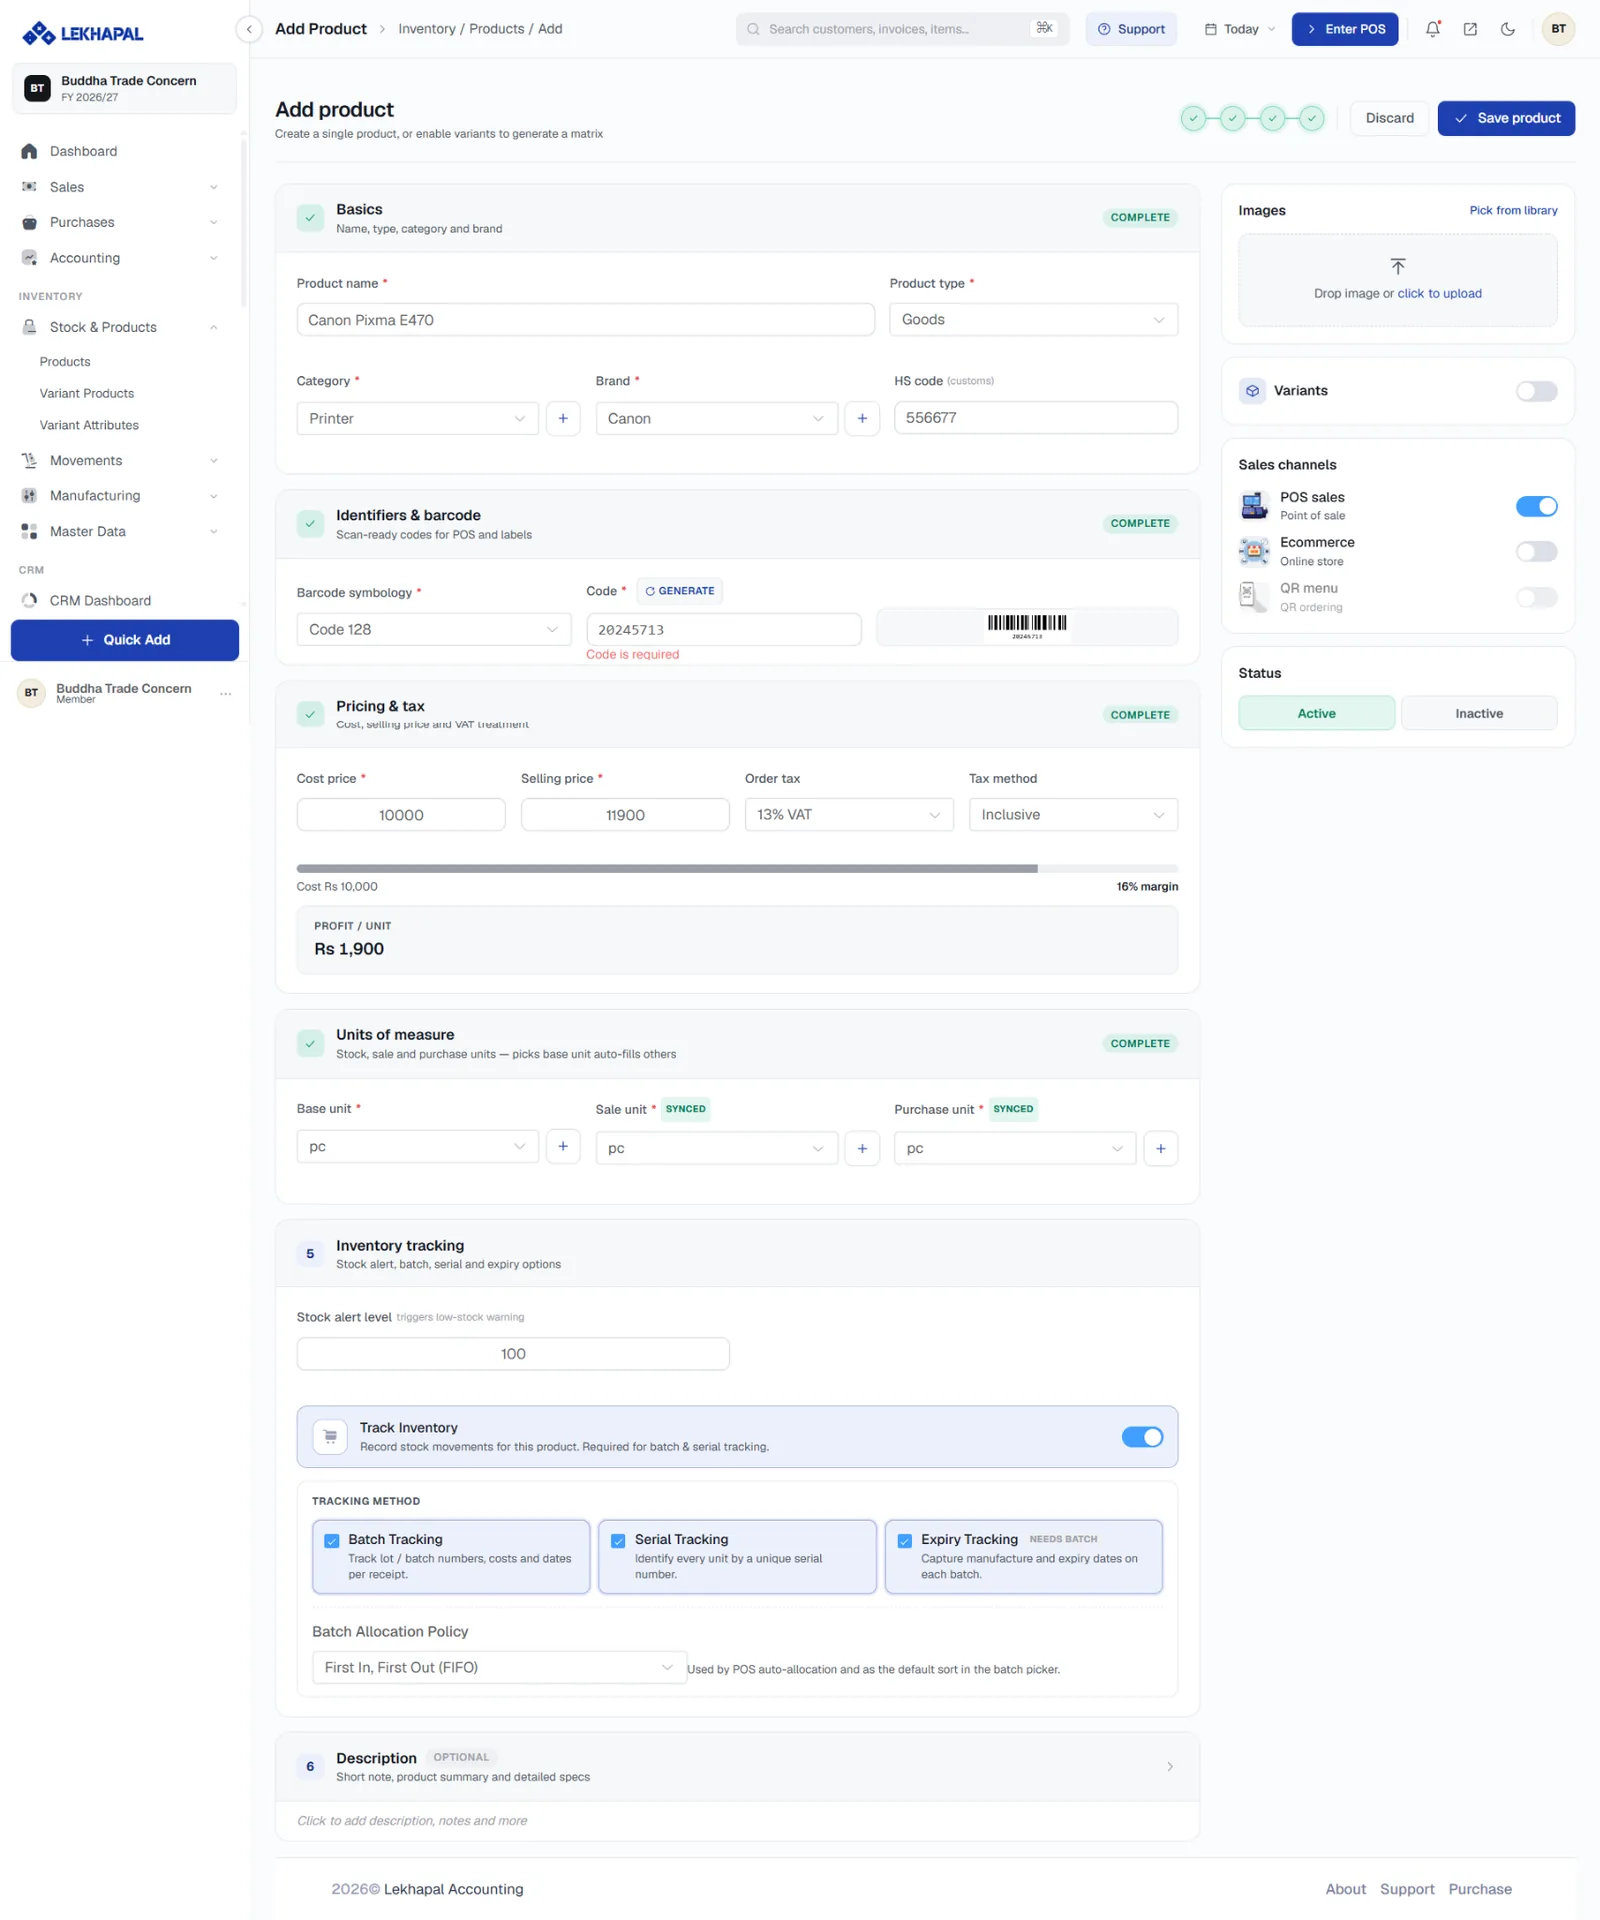
The form is a six-step checklist. Each section shows COMPLETE once its required fields are filled, and the progress dots in the header track how far you have got.
1. Basics
| Field | Notes |
|---|---|
| Product name | What it is called everywhere |
| Product type | Goods (stockable) or Service (not stocked) |
| Category | From Categories — + adds one inline |
| Brand | From Brands |
| HS code | Customs code, printed on the tax invoice |
2. Identifiers & barcode
Choose a Barcode symbology (for example Code 128) and enter a Code, or click GENERATE to create one. A live barcode preview appears beside it, ready for label printing and POS scanning.
3. Pricing & tax
| Field | Notes |
|---|---|
| Cost price | What you pay |
| Selling price | What you charge |
| Order tax | For example 13% VAT |
| Tax method | Inclusive or Exclusive |
Below these, a margin bar and a PROFIT / UNIT figure update as you type — so you can see whether the price actually works before saving it.
4. Units of measure
Set the Base unit, the Sale unit and the Purchase unit. Choosing the base unit auto-fills the other two, marked SYNCED; change them if you buy in boxes and sell in pieces. Units come from Master Data → Units.
5. Inventory tracking
| Setting | What it does |
|---|---|
| Stock alert level | Below this quantity, the product raises a low-stock alert on the dashboard and in the Product Quantity Alerts report |
| Track Inventory | Records stock movements for this product. Required for batch and serial tracking |
| Batch Tracking | Tracks lot or batch numbers, costs and dates per receipt |
| Serial Tracking | Identifies every unit by a unique serial number |
| Expiry Tracking | Captures manufacture and expiry dates per batch. Requires batch tracking |
| Batch Allocation Policy | For example First In, First Out (FIFO) — used by POS auto-allocation and as the default sort in the batch picker |
6. Description
An optional short note, product summary and detailed specs.
The right-hand panel
| Panel | What it controls |
|---|---|
| Images | Drag and drop, upload, or Pick from library |
| Variants | The toggle that turns this into a variant product — see below |
| Sales channels | Publish to POS sales, Ecommerce and QR menu independently |
| Status | Active or Inactive |
Click Save product.
Turn tracking on before you have stock
Batch and expiry tracking apply to receipts made after you enable them. For medicines, food and anything else with a shelf life, set it up before your first purchase.
Variant products
A variant product is one product sold in several versions — the same item in different sizes or colours.
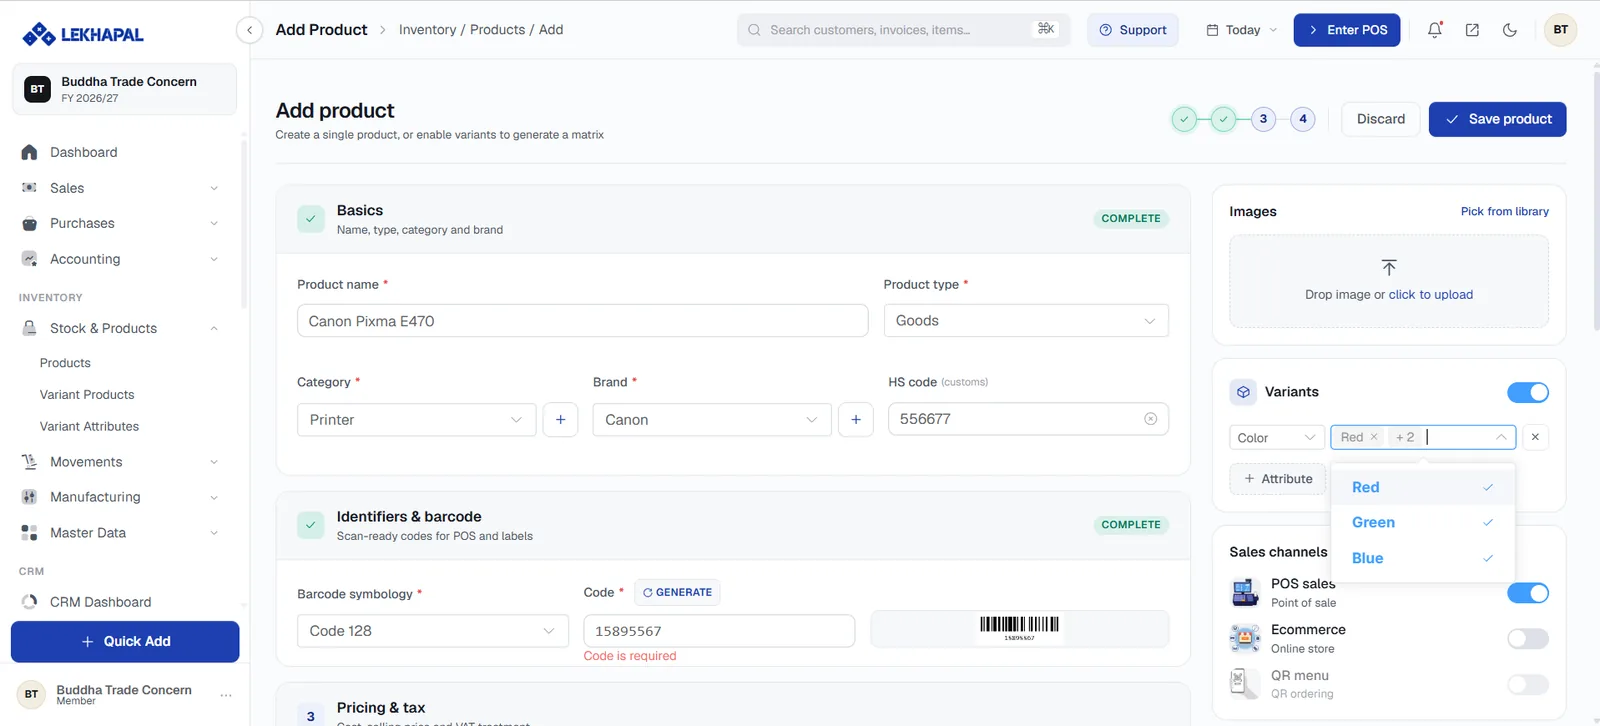
- Turn on Variants in the right-hand panel.
- Choose an attribute (for example Color) and tick its values — Red, Green, Blue.
- Click + Attribute to combine a second one, such as Size.
- Lekhapal generates the matrix: every combination becomes its own variant with its own stock, barcode and price.
Variant products are listed separately under Stock & Products → Variant Products.
Example. A printer sold in Red, Blue and Green is one product with three variants — not three products.
Variant attributes
Stock & Products → Variant Attributes
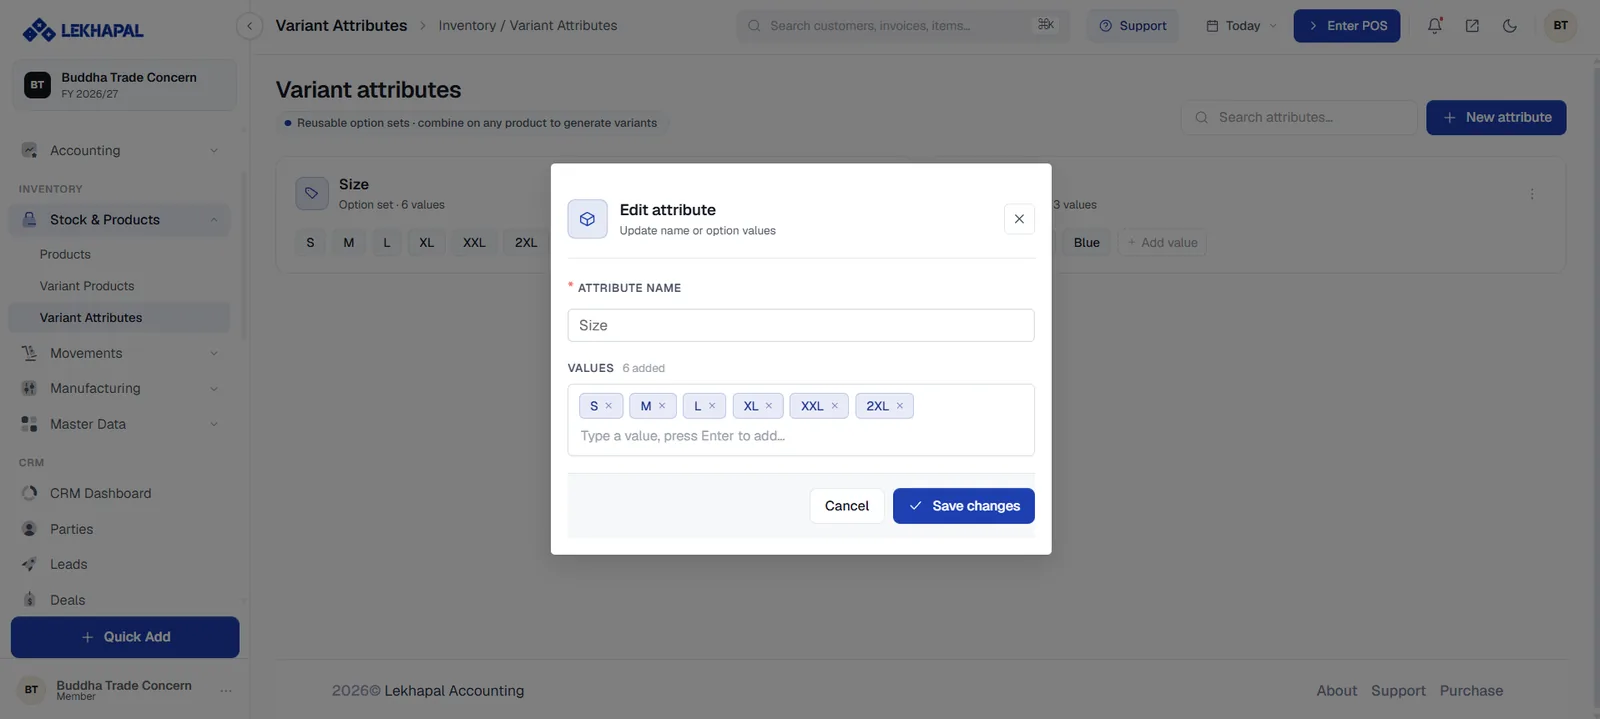
Attributes are reusable option sets: define Size once with the values S, M, L, XL, XXL, 2XL, and combine it on any product to generate variants.
To create or edit one:
- Click + New attribute, or the ⋮ menu on an existing attribute.
- Enter the Attribute name.
- Type each value and press Enter to add it. Remove one with its ✕.
- Click Save changes.
Example. Size → S, M, L, XL. Color → Red, Green, Blue.